Last Minute Valentine's For Kids & Teachers

Who remembers the excitement of Valentine’s Day at school as a kid? You browsed the aisles for the perfect cardboard box full of Valentine’s cards, paired those with your favorite candy and chose the biggest cards to give to your best friends or your crush. Life was so simple then…..

No but really. It was. Today we have to navigate continuously changing school policies, candy bans and even restrictions due to COVID. So, insert this post! It comes from yours truly…..a LAST MINUTE MAMA…..who wants to make prepping for your kiddo’s Valentine’s Day celebration that much easier.

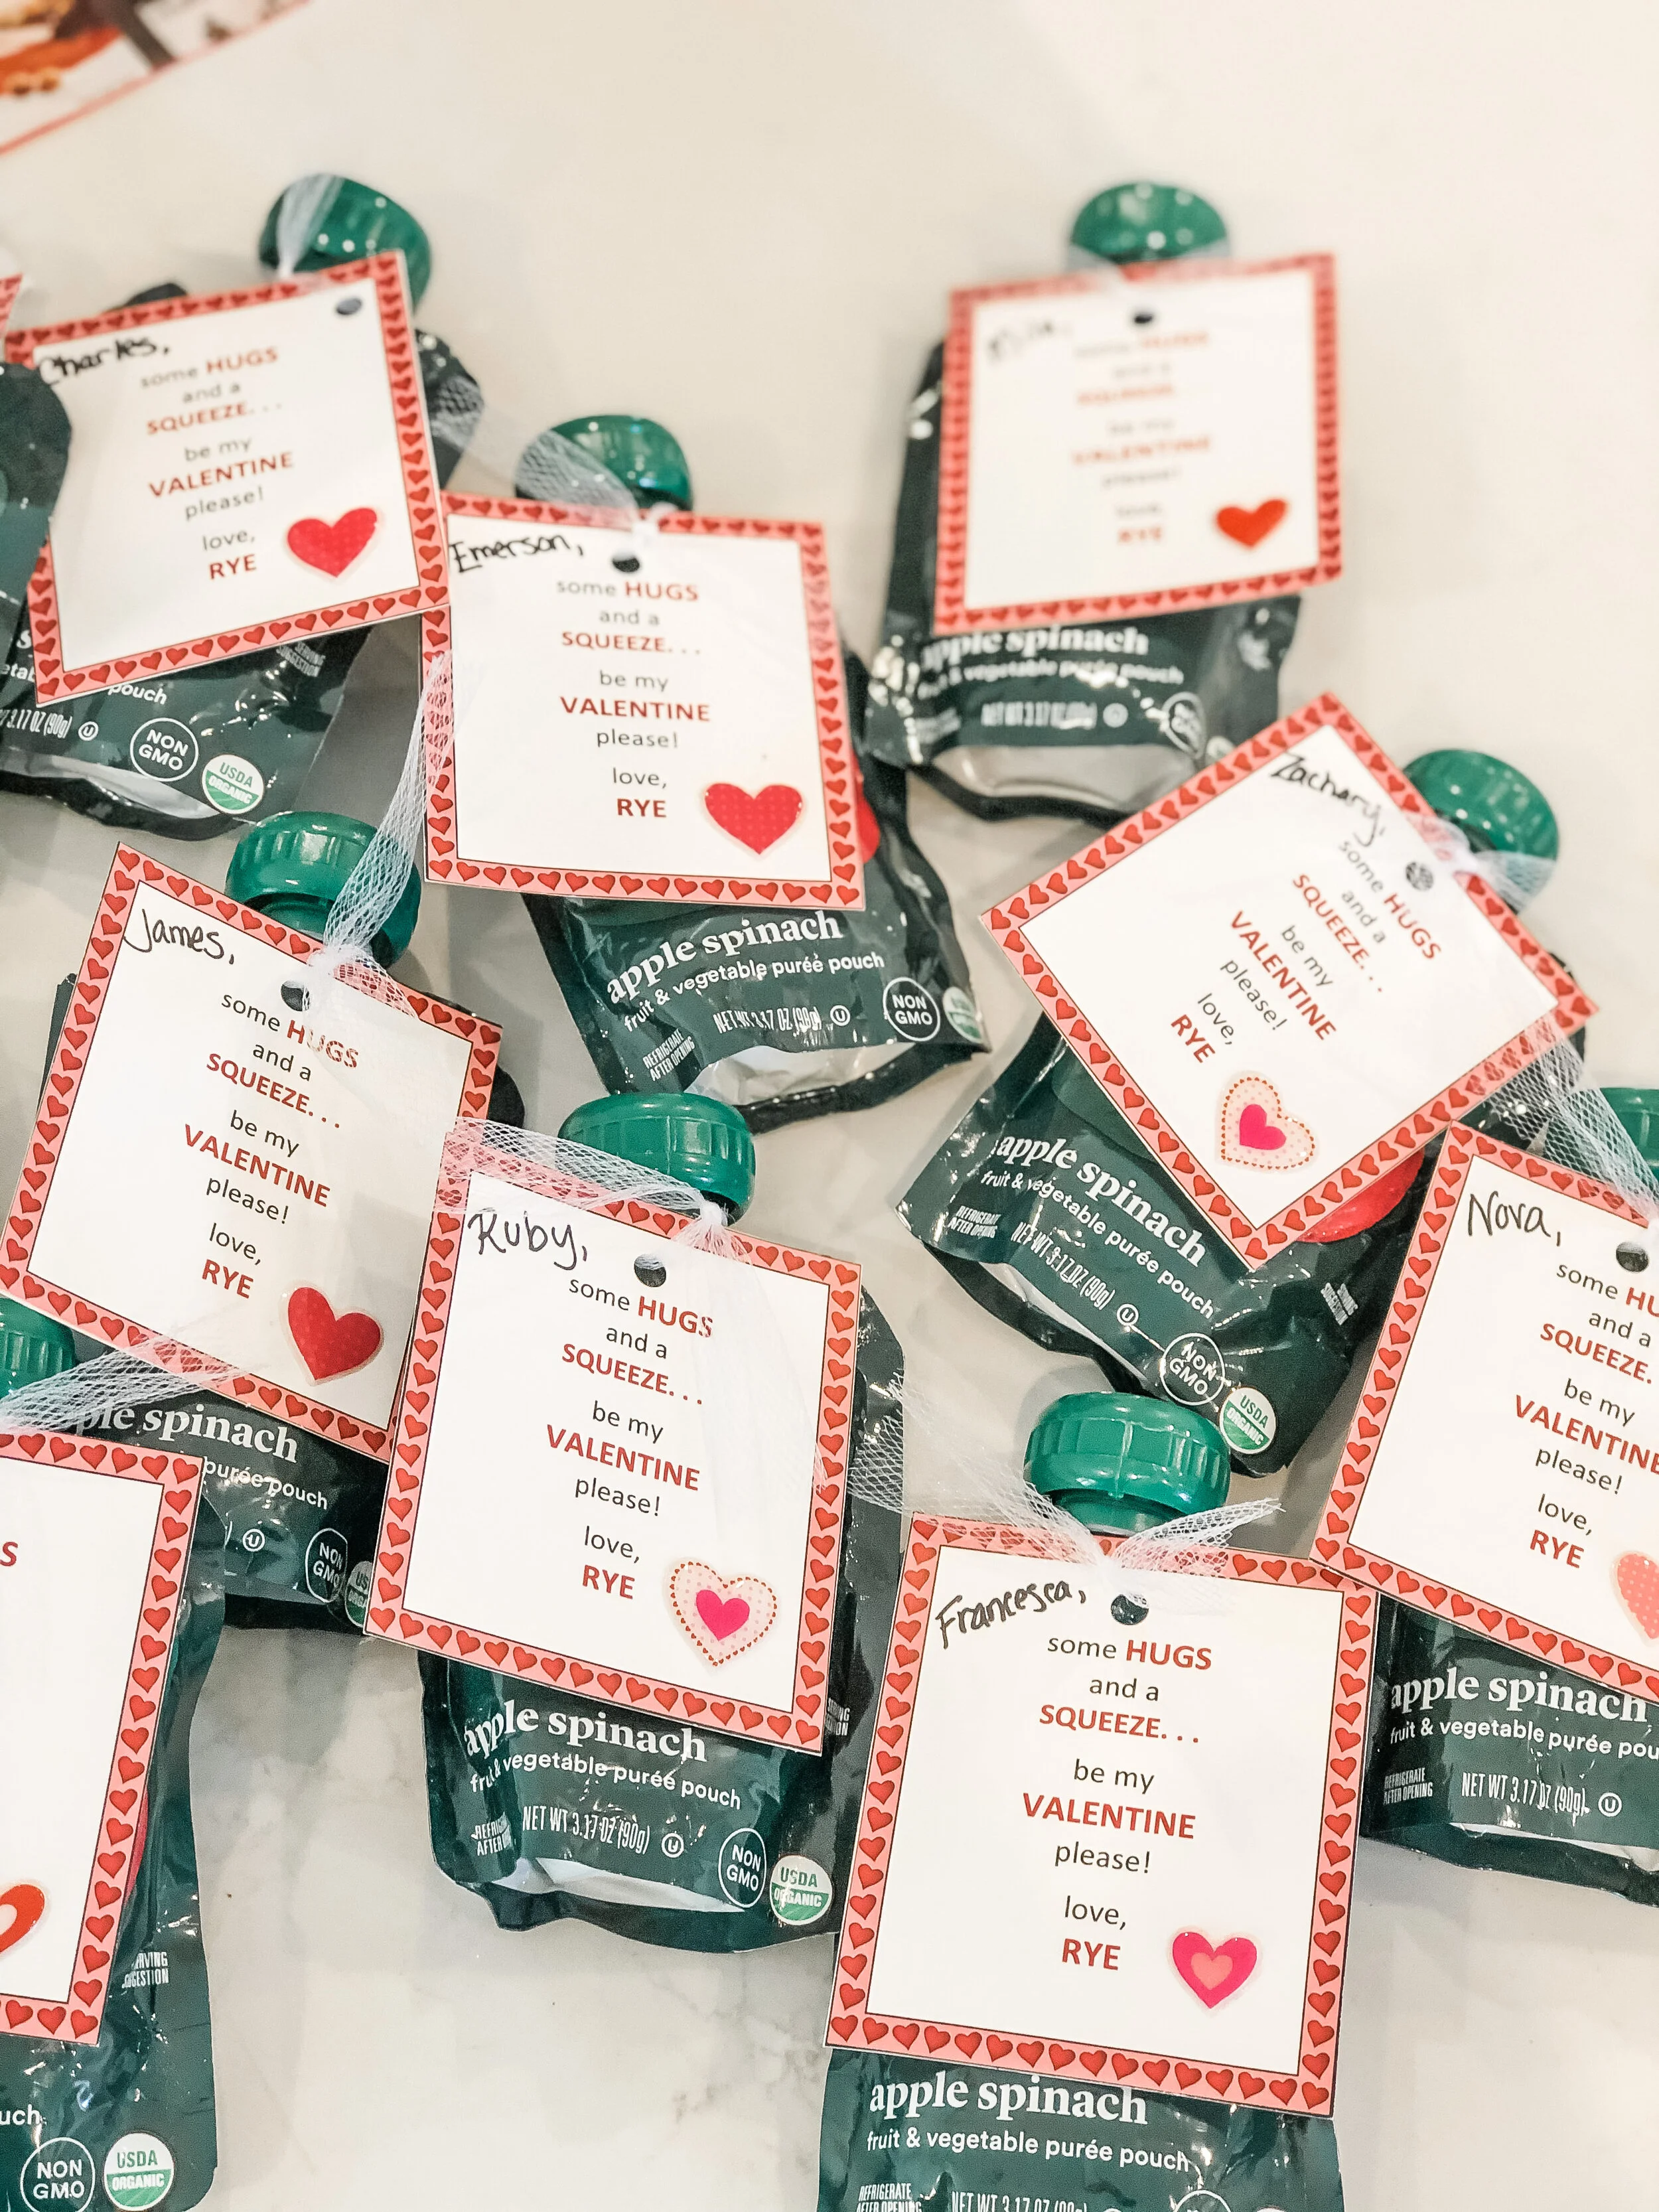
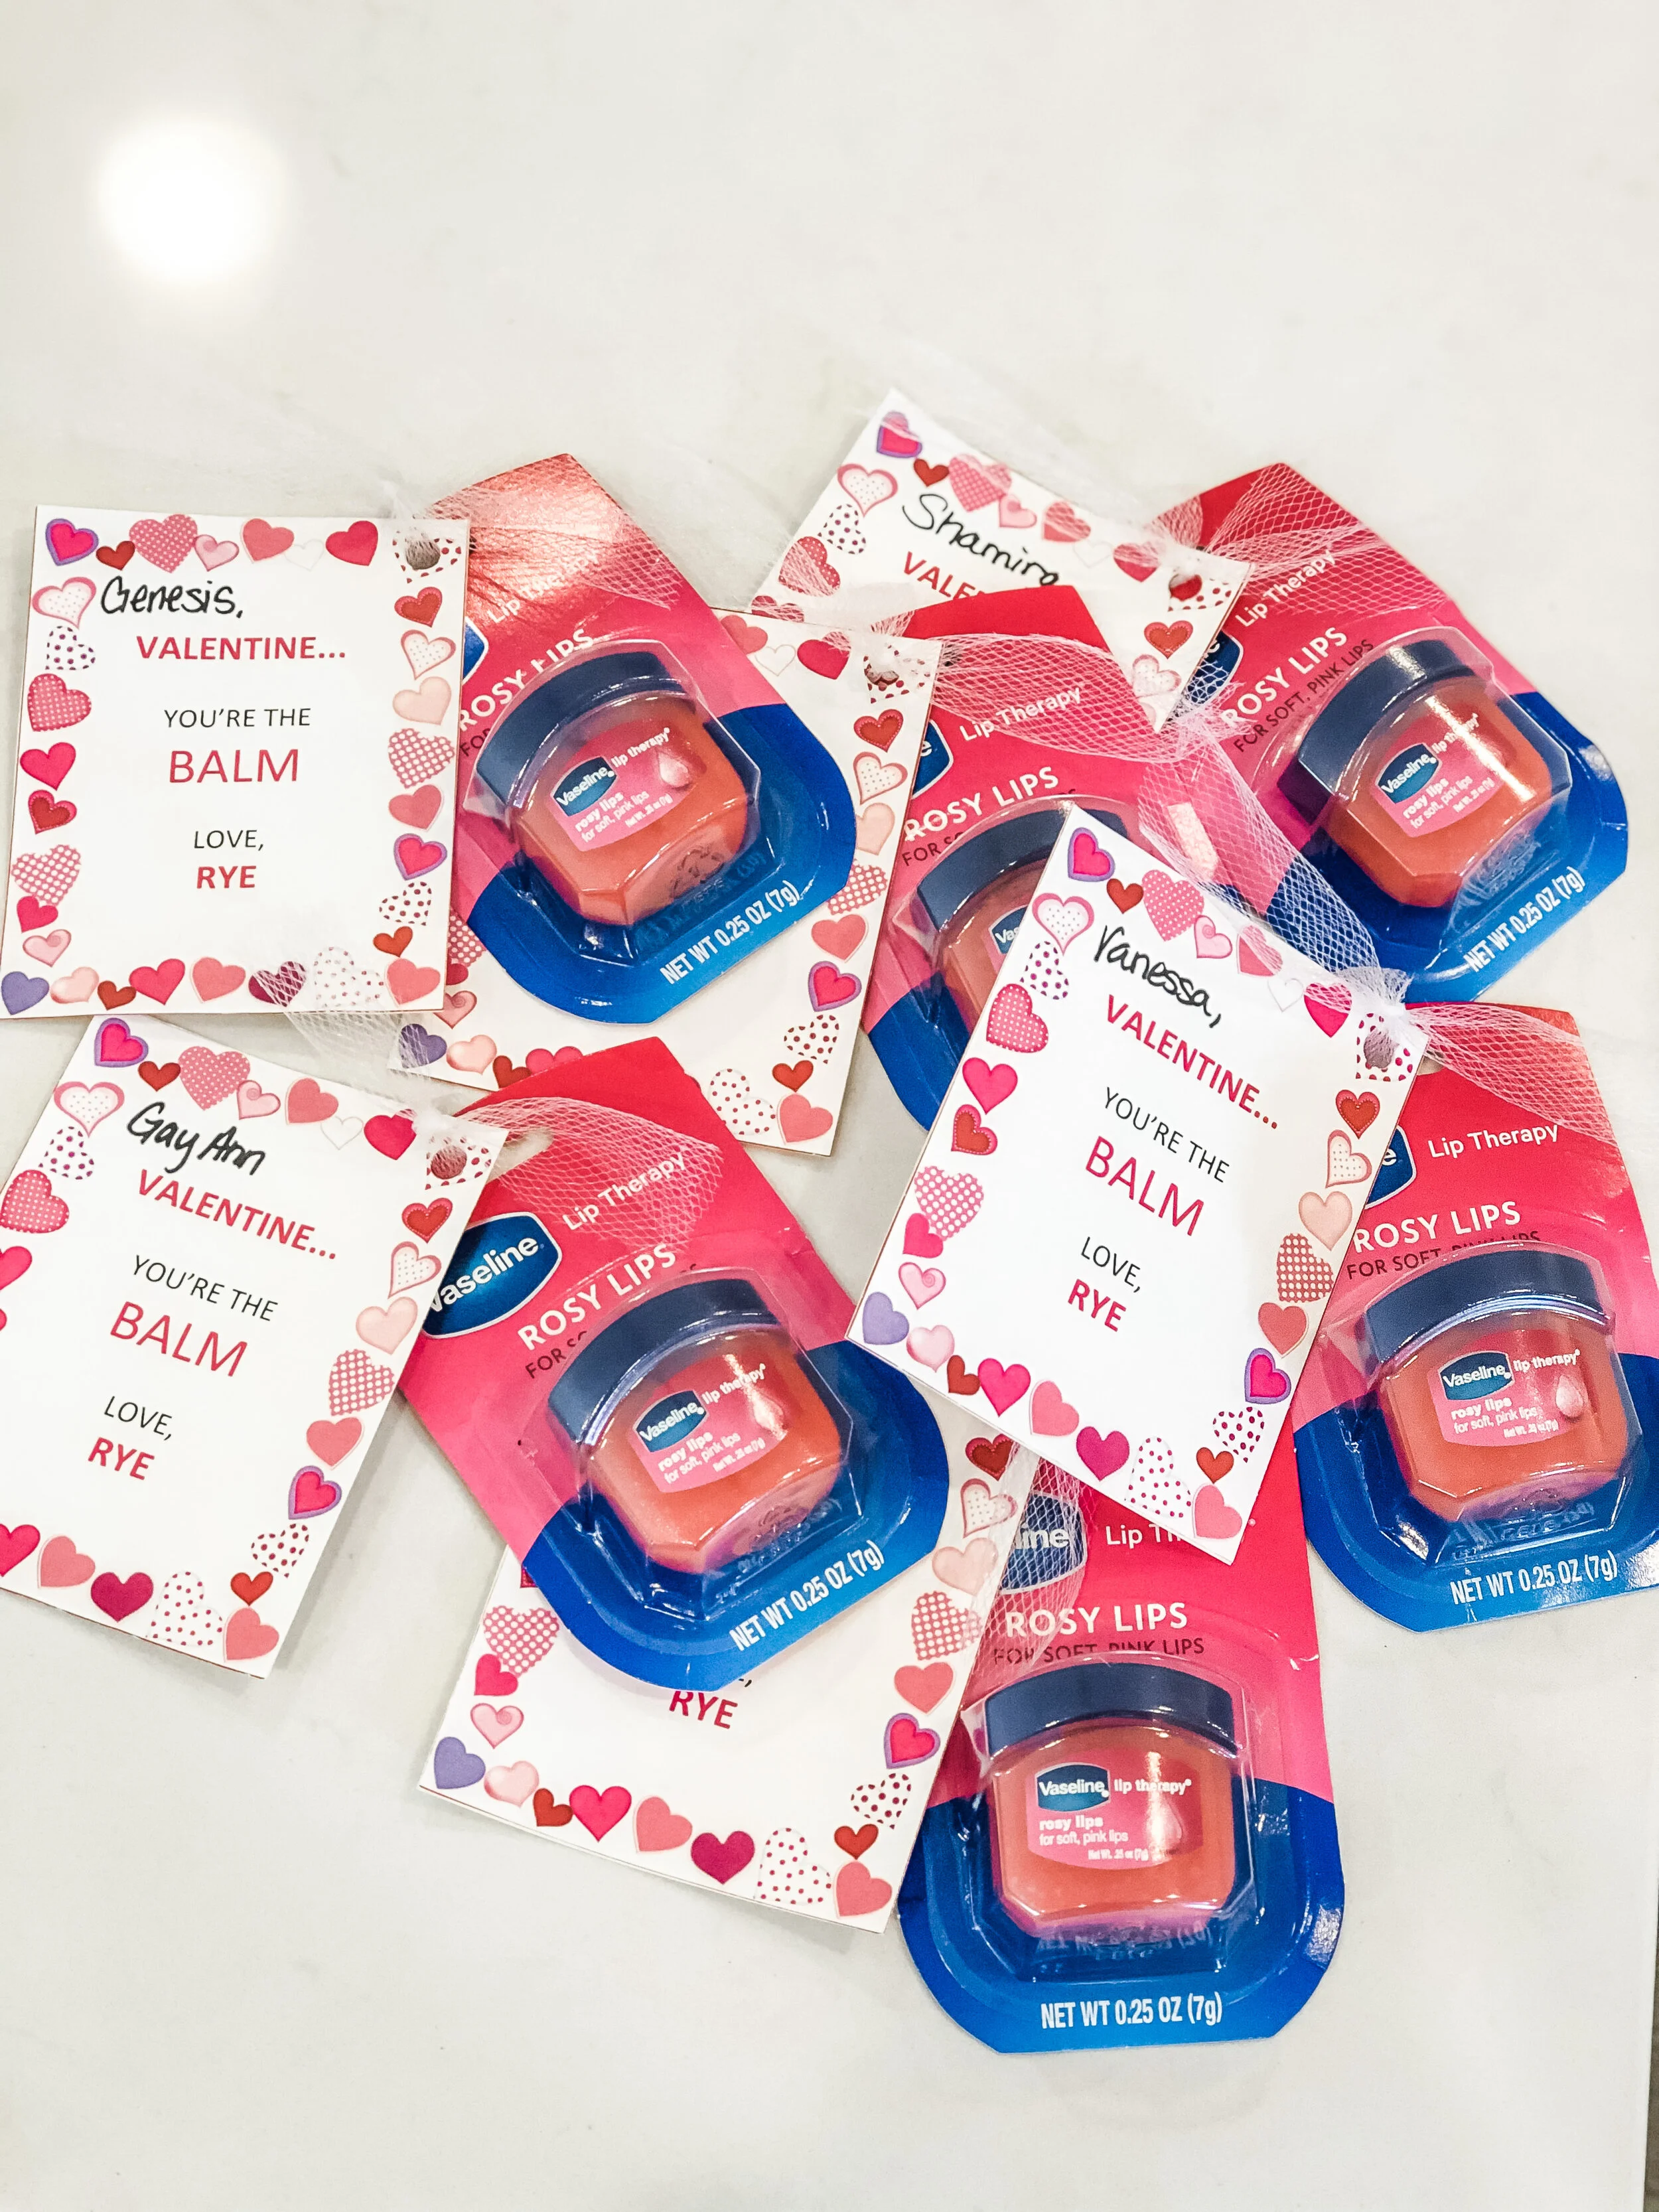
It was February 12, 2020 and my husband and I were flying back from our first trip without kids. As I waltzed in the door relaxed and refreshed, that #momlife smacked me right in the face as I was reminded I needed to bring in some Valentine’s Day treats for my son’s school. Thankfully, through Target order pickup saving my butt, and a few clicks on my computer, I created these easy and fun Valentine’s Day treats perfect for kids and teachers of all ages! Keep reading for a downloadable Word template at the end.

SUPPLY LIST

DIRECTIONS

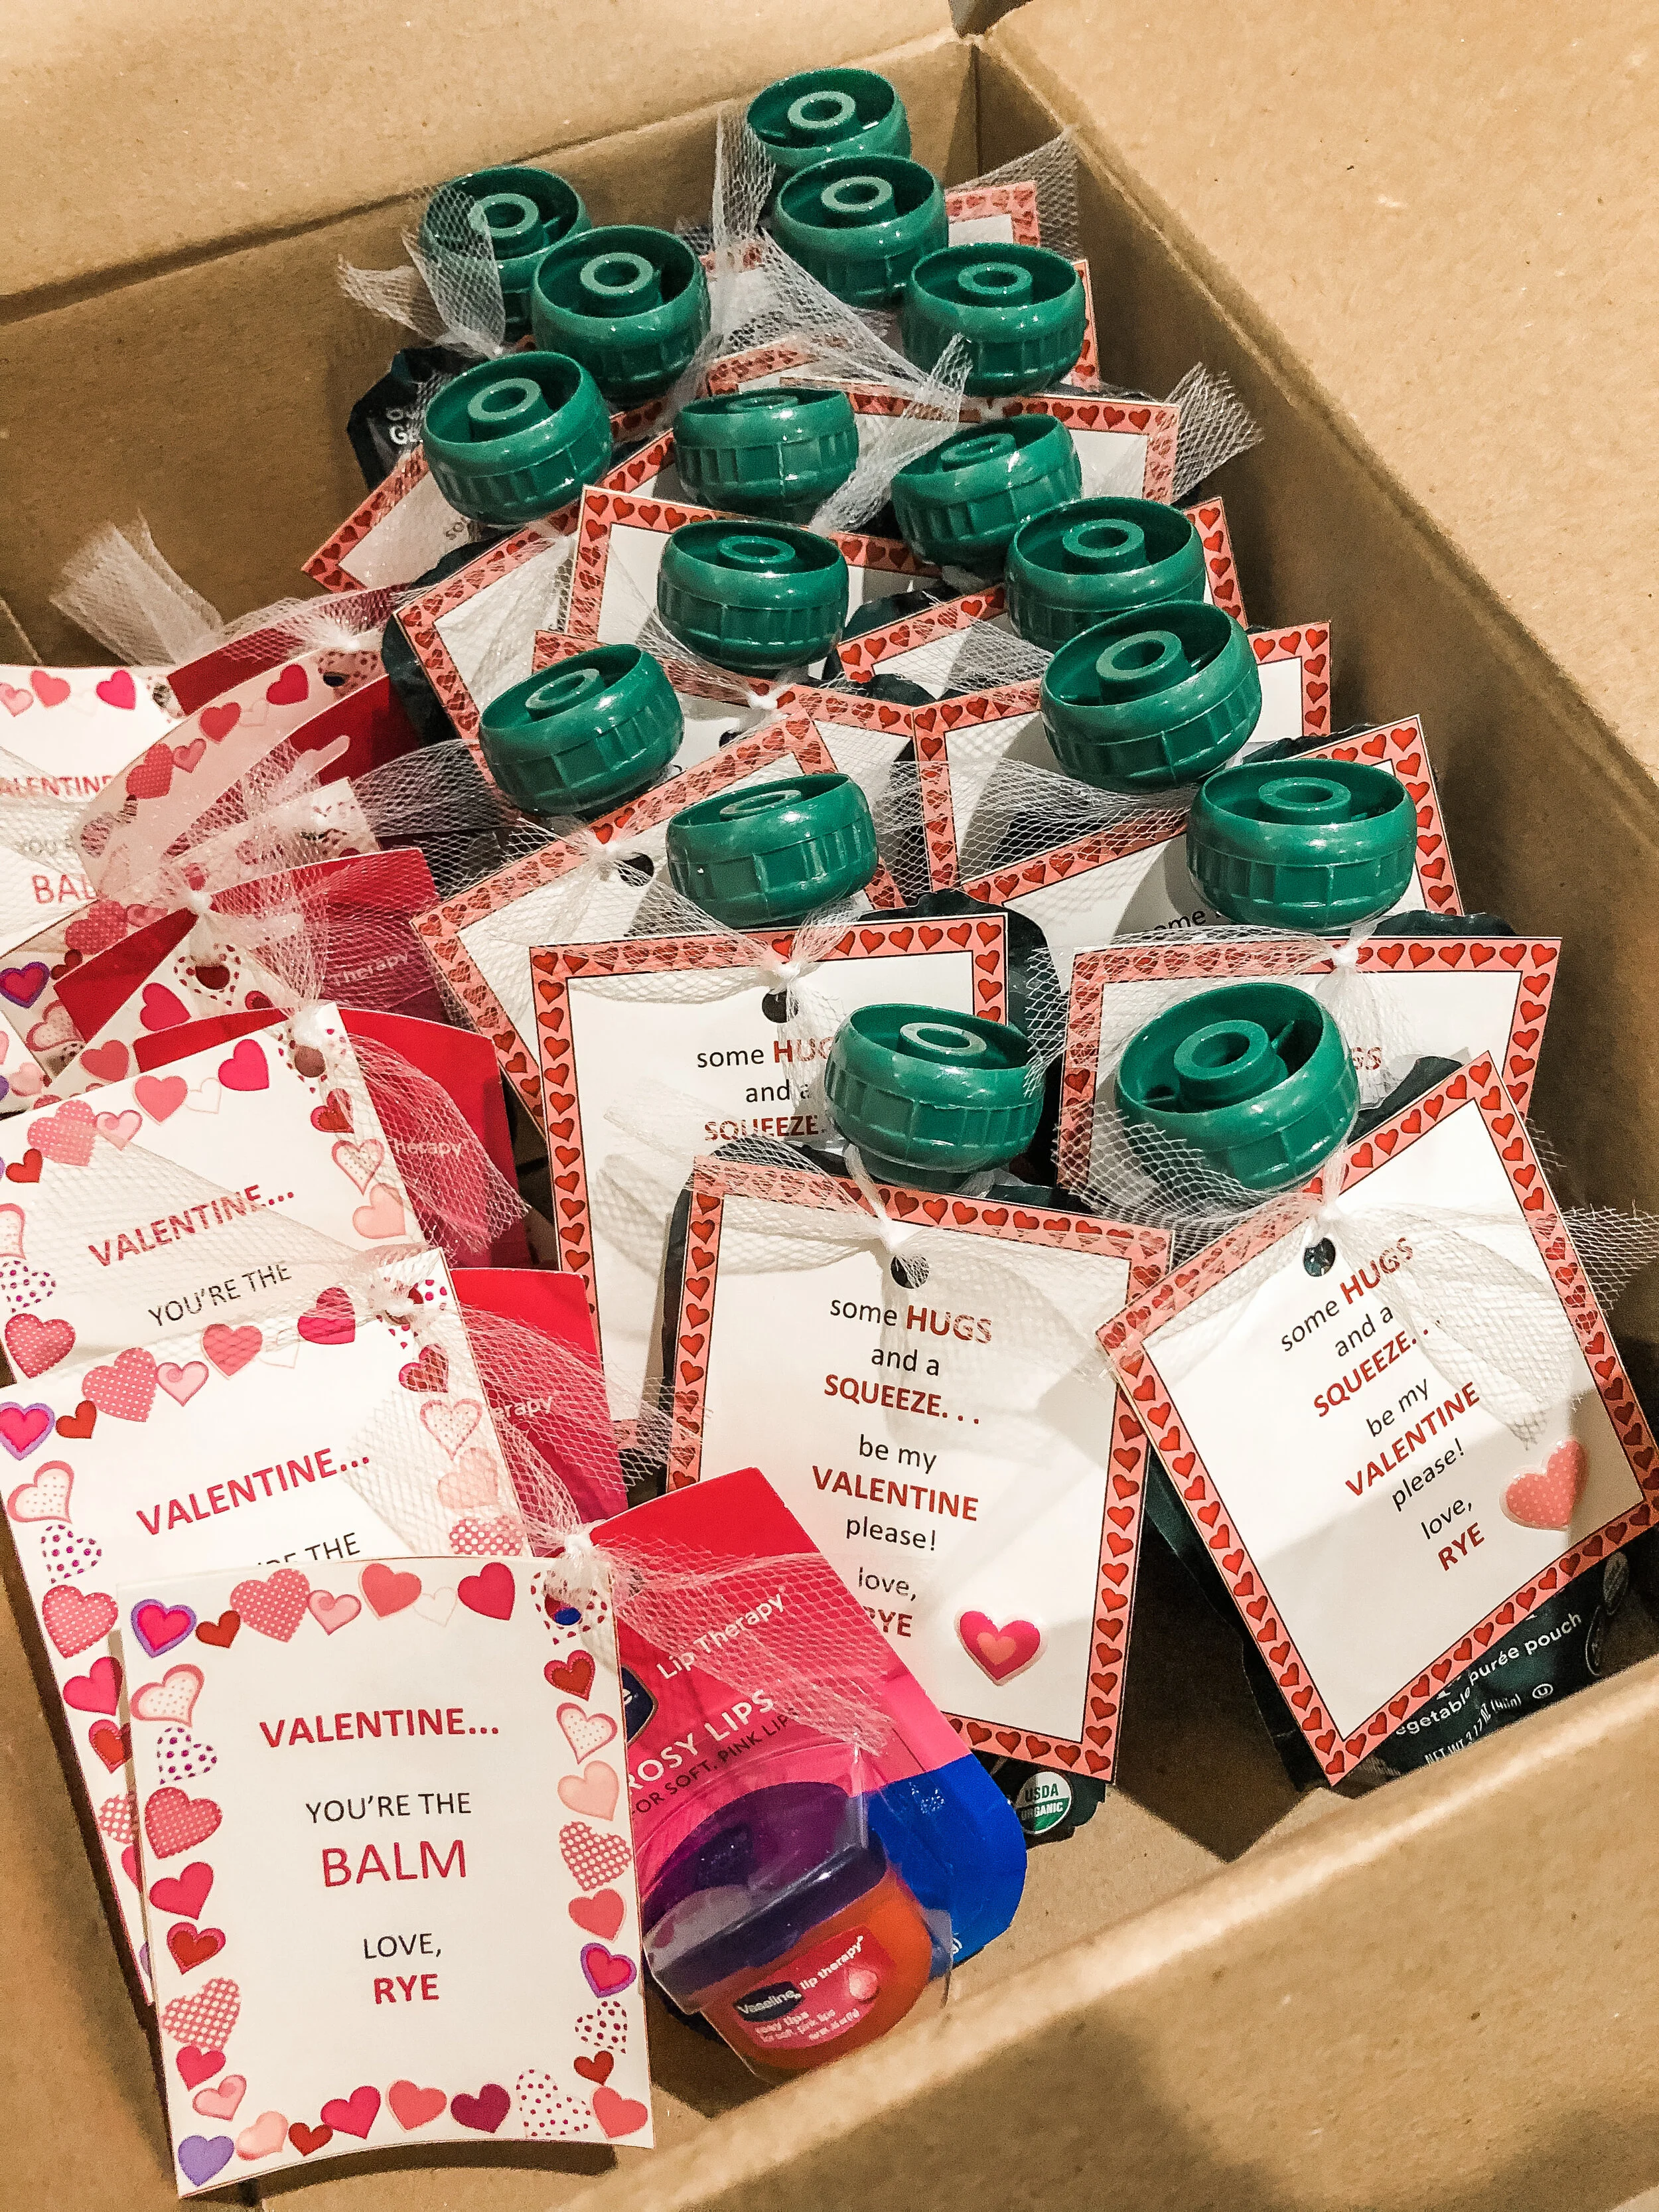
  1. Decide which template you’d like to use and download via the link. I created both and used the Hugs & Squeeze Template for kids and the You’re The Balm Template for the teachers. To download, simply click on the link and then hit the download icon in the corner. Once the template is downloaded (Word Doc format), you can edit to add the name of your child in the bracketed space. After adding your child’s name, print the template on the cardstock using colored ink. There are 4 cards per page, so make sure you print the appropriate amount.

  2. Place your same day pickup or delivery order! I used Target order pickup on February 13th…yes you read that right. But, since it isn’t that close yet, you can also place an Amazon, Walmart, etc. order.

  3. After you have all of your supplies, cut out each card following the lines from the template. Punch a hole in the corner of each card and cut ribbons according to the size you need. Thread the cut ribbon through each hole.

  4. Optional: Add a sticker to each card for some extra flare and/or add the name of each person to make it more customized!

  5. Tie the ribbon with the card around the neck of each pouch or through the hole in each lip balm (I used the hole where it hangs in the store). If you buy a multipack or use a lip balm without any hole, you can easily add each lip balm to a plastic or satin bag and hole punch that, stringing the ribbon through in the same way.

  6. You’re finished! Pack them up and get ready to have the cutest Valentine’s in the class.

CHECK OUT MORE SUPPLIES BELOW
Organizing A Pantry for $100 or Less!

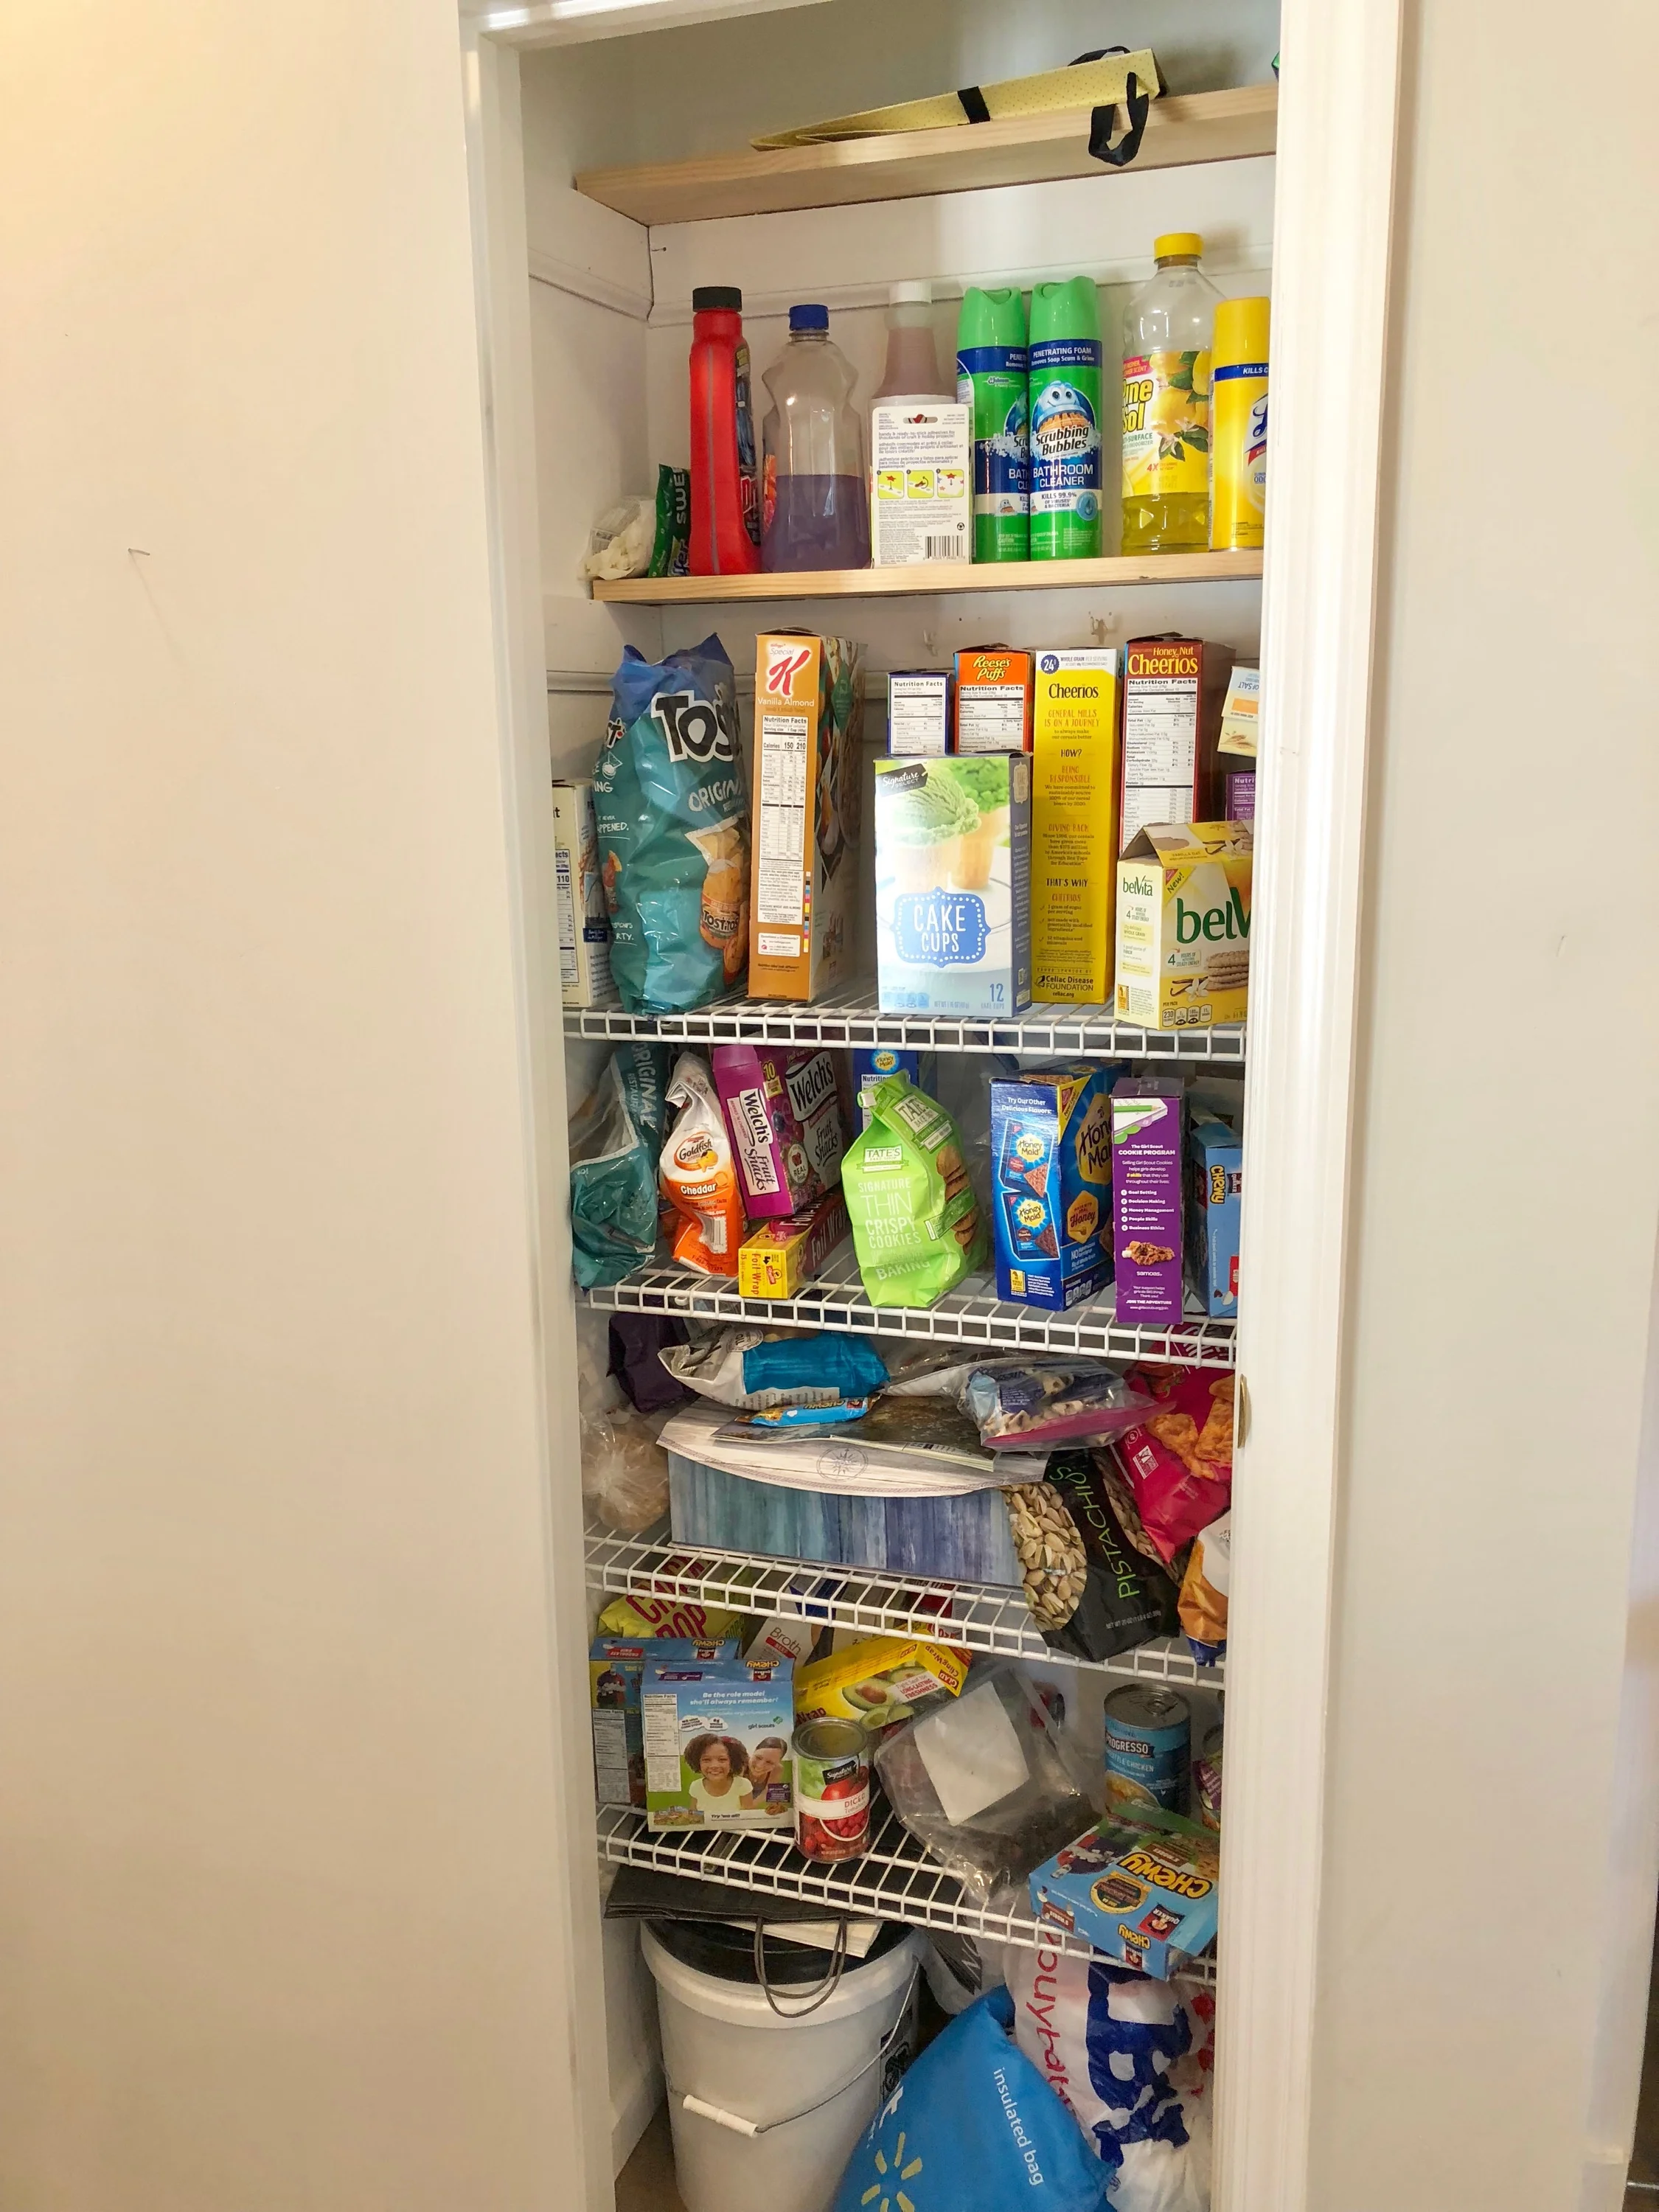
I think I have hit full blow "nesting" mode because I suddenly have had the urge to organize everything in my house! One of the things that I desperately wanted to get organized was the pantry in our kitchen.  Now the pantry we have isn't huge, it actually started out as a broom closet but I quickly convinced my husband this wasn't the most efficient use of space and asked him to install some shelving.  After the broom closet was converted, I sort of just threw a bunch of stuff in there, but quickly found it was getting harder and harder to find things, things were expiring, we were opening multiple packages of the same thing....it was a mess! 

To give you an idea, here's what it looked like BEFORE! What an unorganized mess! 

It's pretty apparent from the picture that something needed to be done, so I turned to Pinterest for some inspiration.  There were some great general ideas, but a lot of the pictures featured these LARGE, gorgeous pantries that you could walk into or at least fit a ton of stuff in.  Unfortunately, I was still working with my broom closet so I knew I would have to measure and be a little methodical when organizing it. So, below I'm recapping the steps I took to make sure things would fit before I headed out shopping.

Step 1: Measure the height and depth of your shelving.  My shelves vary in height and they certainly are not very deep, so I needed to make sure I took proper measurements so I didn't have to make multiple trips to the store to pick up all of the organization supplies. 

Step 2: Estimate how many containers you will need and what they will be used for.  I started out with my cereal - on average, I have about 3 boxes of cereal open at any one time, so I figured I would need at least 3 containers to hold that.  Then I moved on to things like canned goods, I wanted to determine how many cans I keep in my pantry normally.  I estimated around about 15 between soups and things like tomatoes and vegetables.  If there are other things you'd like to keep in storage containers that seal, then make sure you also account for those items.  Lastly, I tried to estimate about how many open containers I would need for things like granola bars, snack items, etc.  You can do this by using a shoebox as a good estimator for how many can fit across your shelf. 

Step 3: Go shopping! I picked up the majority of my supplies at the Container Store, but if you don't have any interest in shopping there or there isn't one close to you, you can find these items online and through retailers like Amazon as well.  I will link everything I bought throughout this post!  I set a budget for myself for around $100.  I knew I wanted all BPA free plastic and also some higher quality sealing containers for the things like cereal that I wanted to keep fresh for a long time.  

OKAY - now it is time to clear out the mess and start ORGANIZING! This is the fun part! Or at least I thought so...............


STEP BY STEP GUIDE to the ORGANIZATION

STEP 1: REMOVE EVERYTHING: You'll want to start with a completely clean and open space so you can see what you are working with! 

STEP 2: PLAY AROUND WITH THE LAYOUT - In this part you'll want to lay out everything you bought in order to determine if you have enough things to store all of your items and also to figure out how you want to space the containers, what things you want on what shelves, etc.  Play around with it for a while!  You'll notice that the picture I took here with spacing everything out ended up being a little different from how I actually ended up organizing the pantry.  

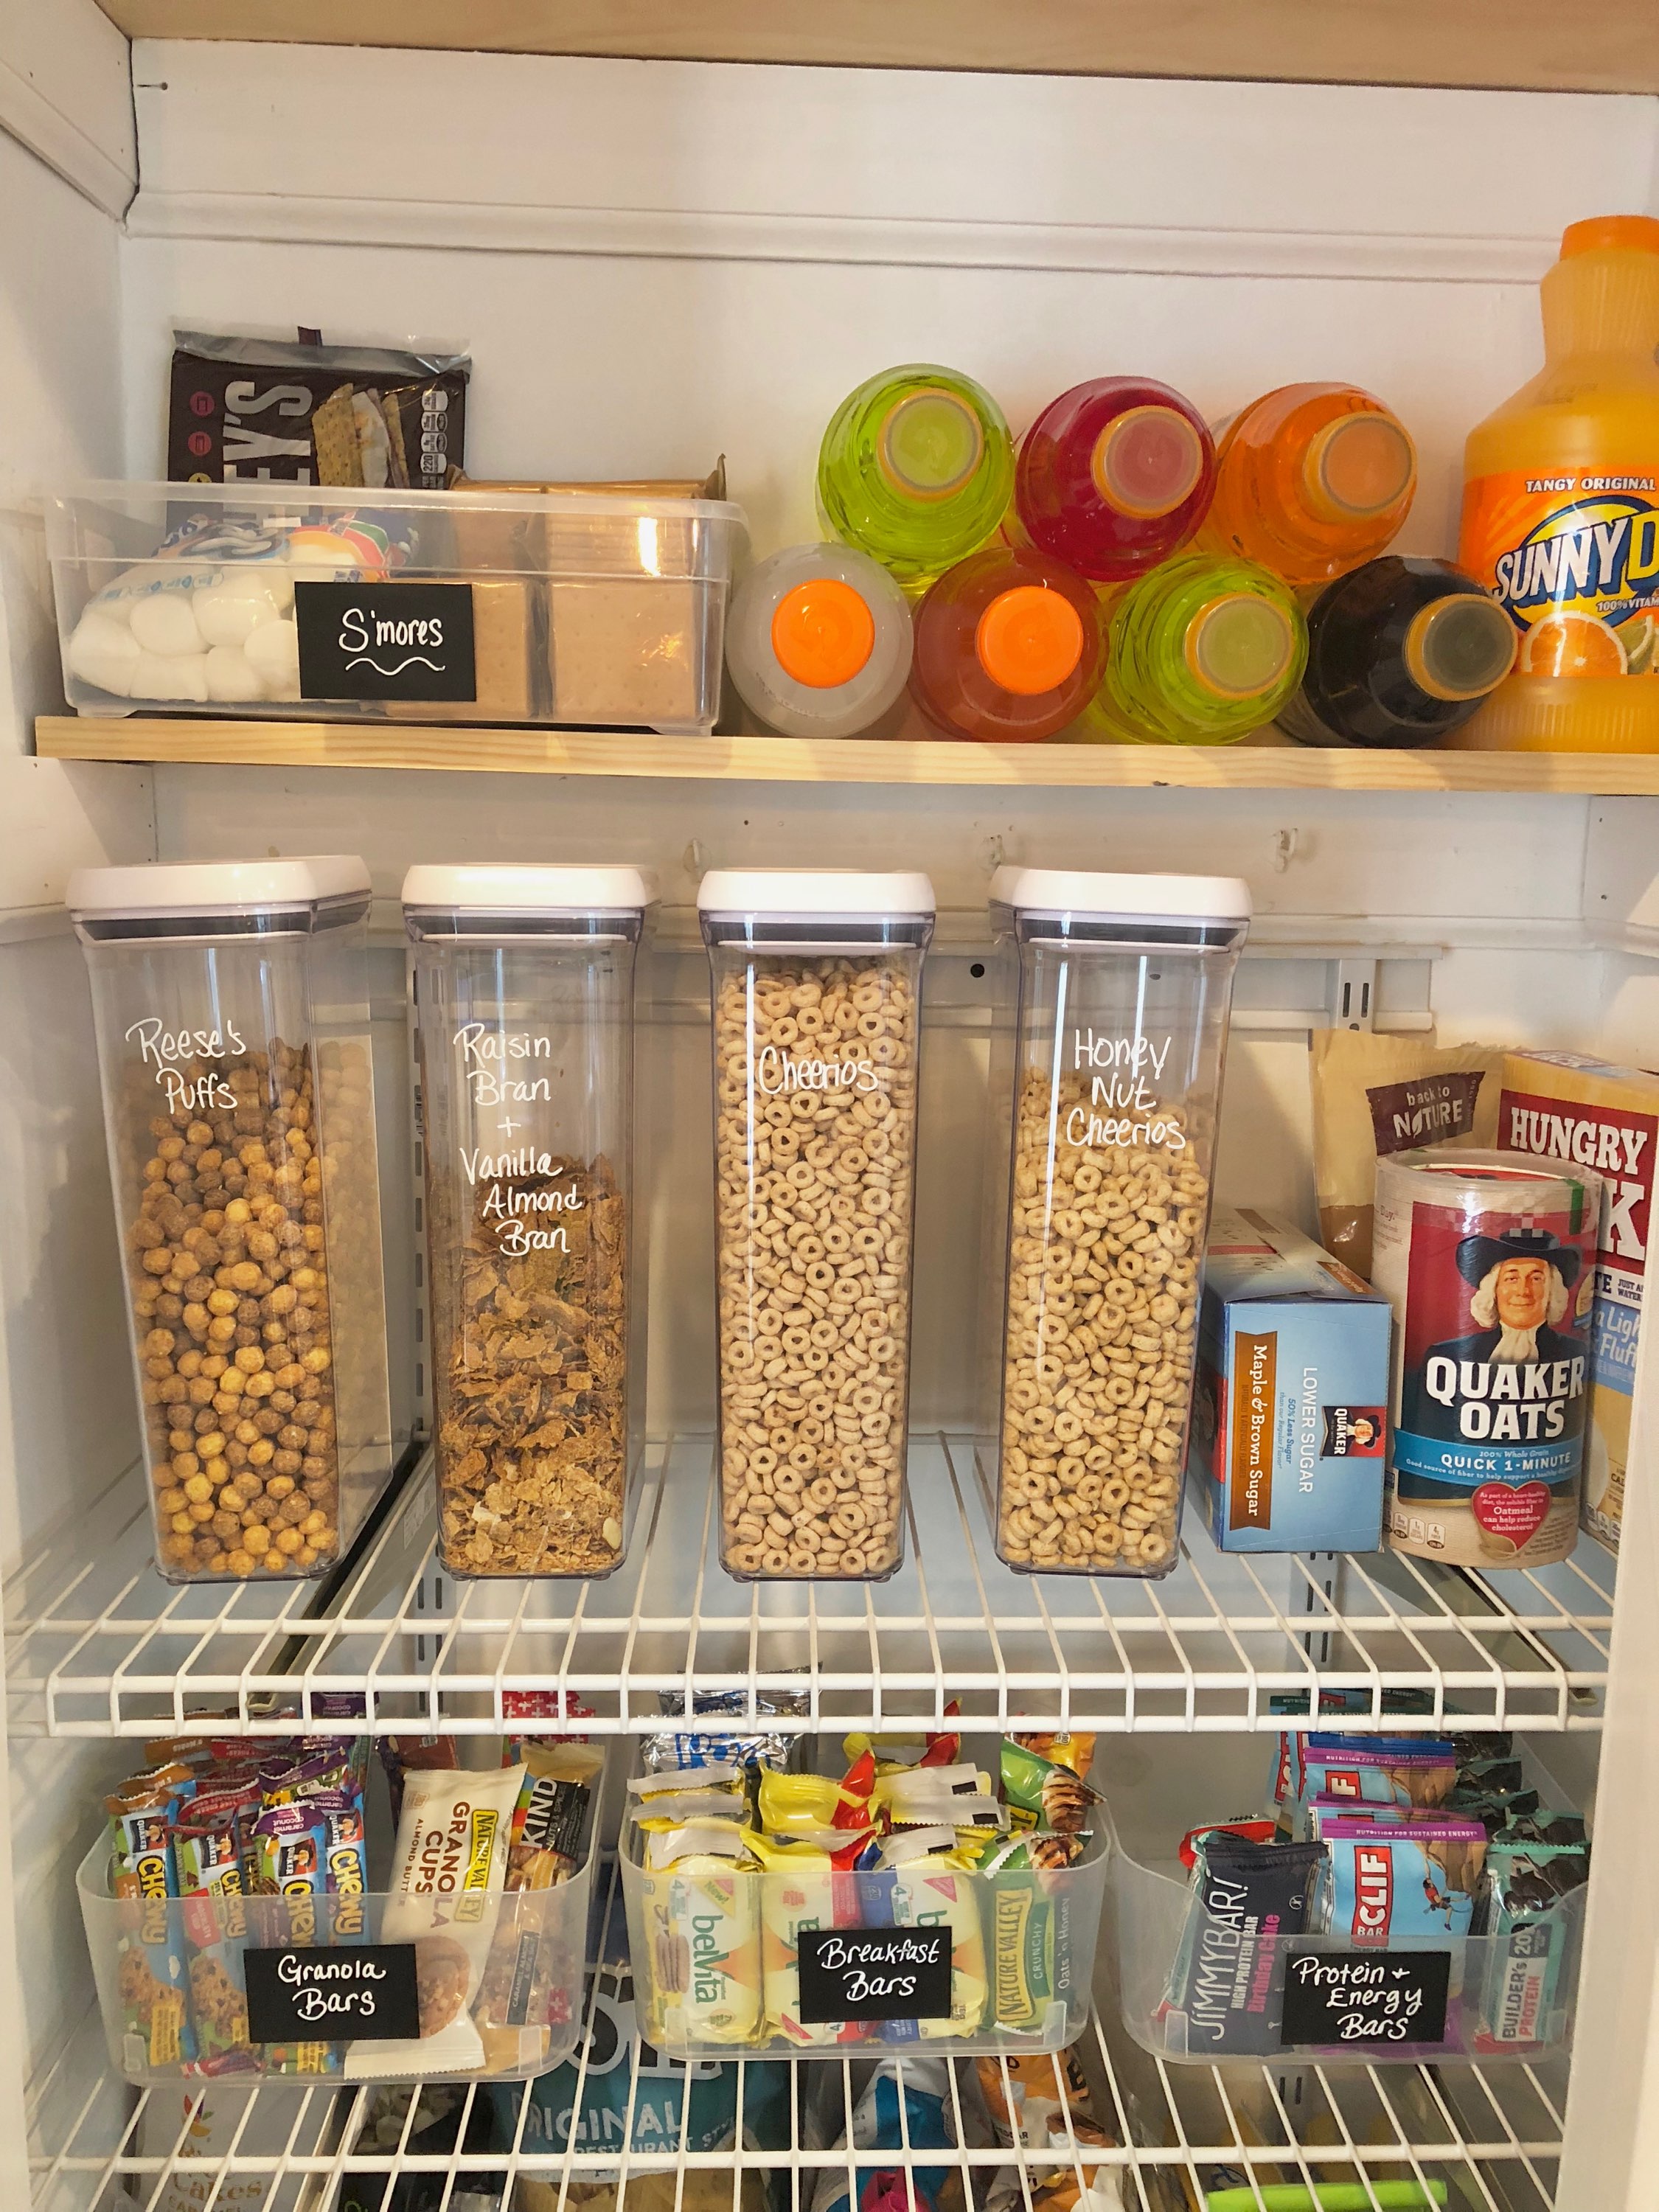
STEP 3: ORGANIZE & LABEL - Now it's time to actually start making some progress.  After you've figured out where you want to place everything, you can start labeling and organizing.  I opted to use adhesive chalkboard stickers and a Chalk Ink marker for my labeling, but you can print labels or make them however you want, put your own spin on it!  The thing I like about the chalkboard labels is that you can easily wipe them clean and re-write if you make a mistake or change what is in your containers.  You can also write directly on the bins and containers if they are plastic, glass, etc. with the Chalk Ink markers!

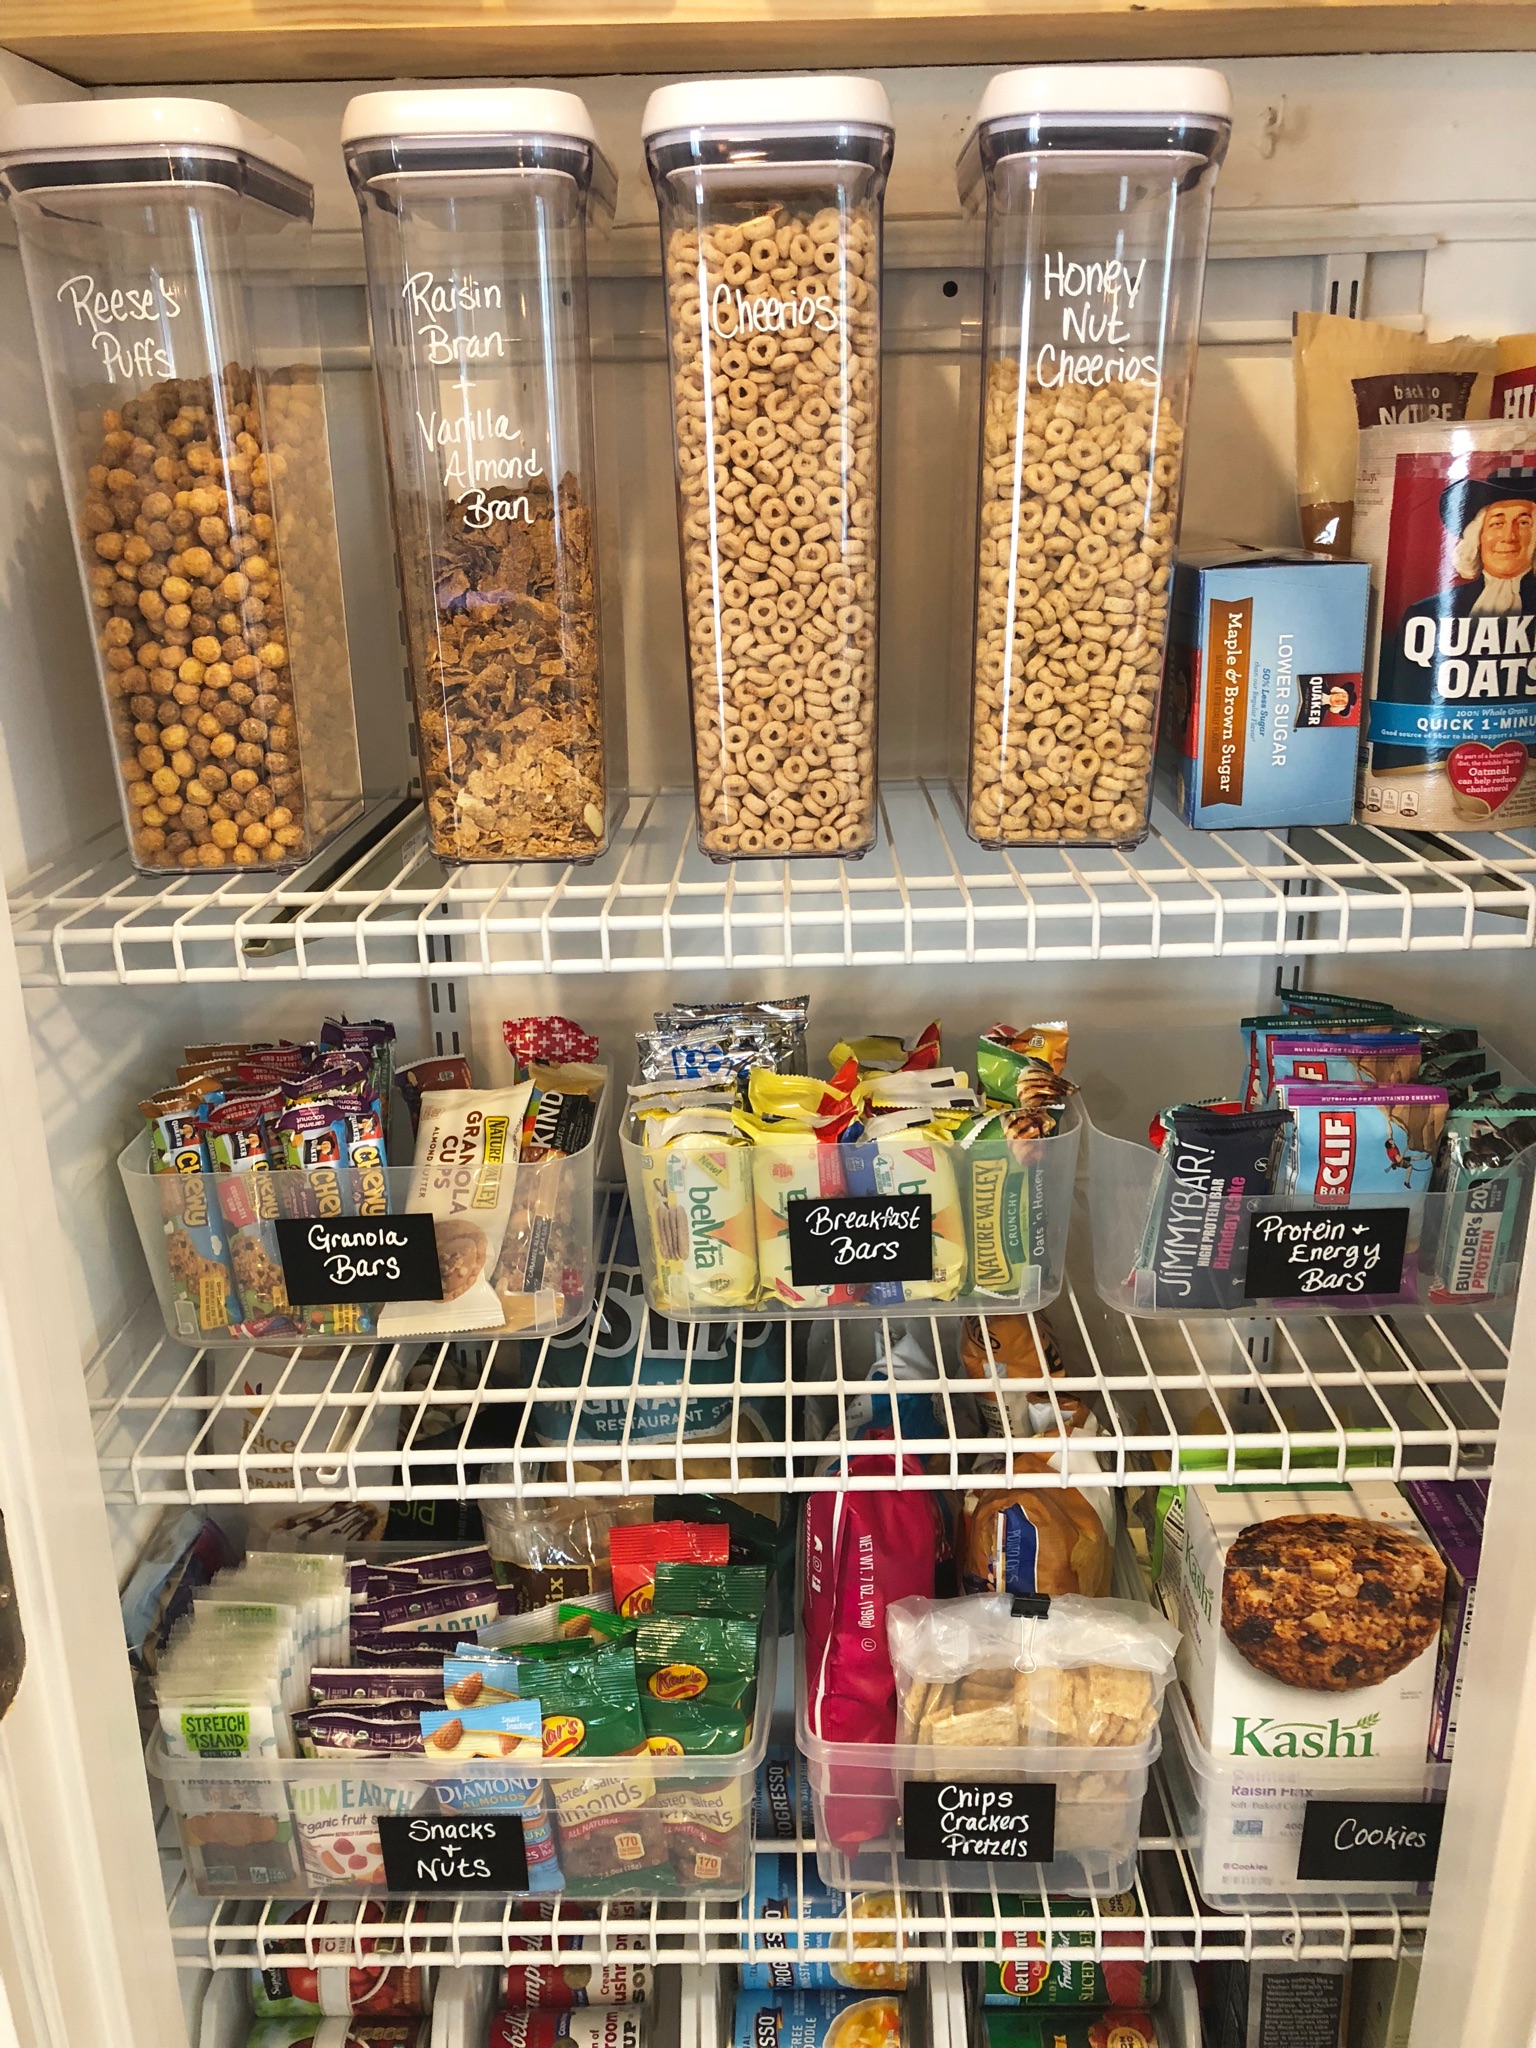
For the containers, I chose a variety of different types of containers and bins.  With the cereal, I knew I wanted to get the sealing OXO POP containers which help to lock in freshness since cereal seems to always go stale (gross)!  If you have a lot of different foods you plan to store in your pantry like pasta, grains, etc., I recommend purchasing an OXO POP Set like this one.  I then found some smaller bins with handles (I purchased the SMALL size) for things like granola and cereal bars.  At the Container Store, there was also an awesome deal on clear shoebox size bins.  If you bought a case of 5, you saved 20%, making each container about $1.60 each..pretty good deal if you ask me! I also found open stackable bins for soup cans and they are the perfect width for large and smaller cans - I got the MEDIUM size!  All of the fancier things made specifically to store cans wouldn't fit into my narrow pantry so when I found these, I figured I'd give them a shot and they are perfect! You can easily stack cans on top of each other but also see everything that you are storing for easy access. They even came with labels already attached so all I needed to do was write on them.

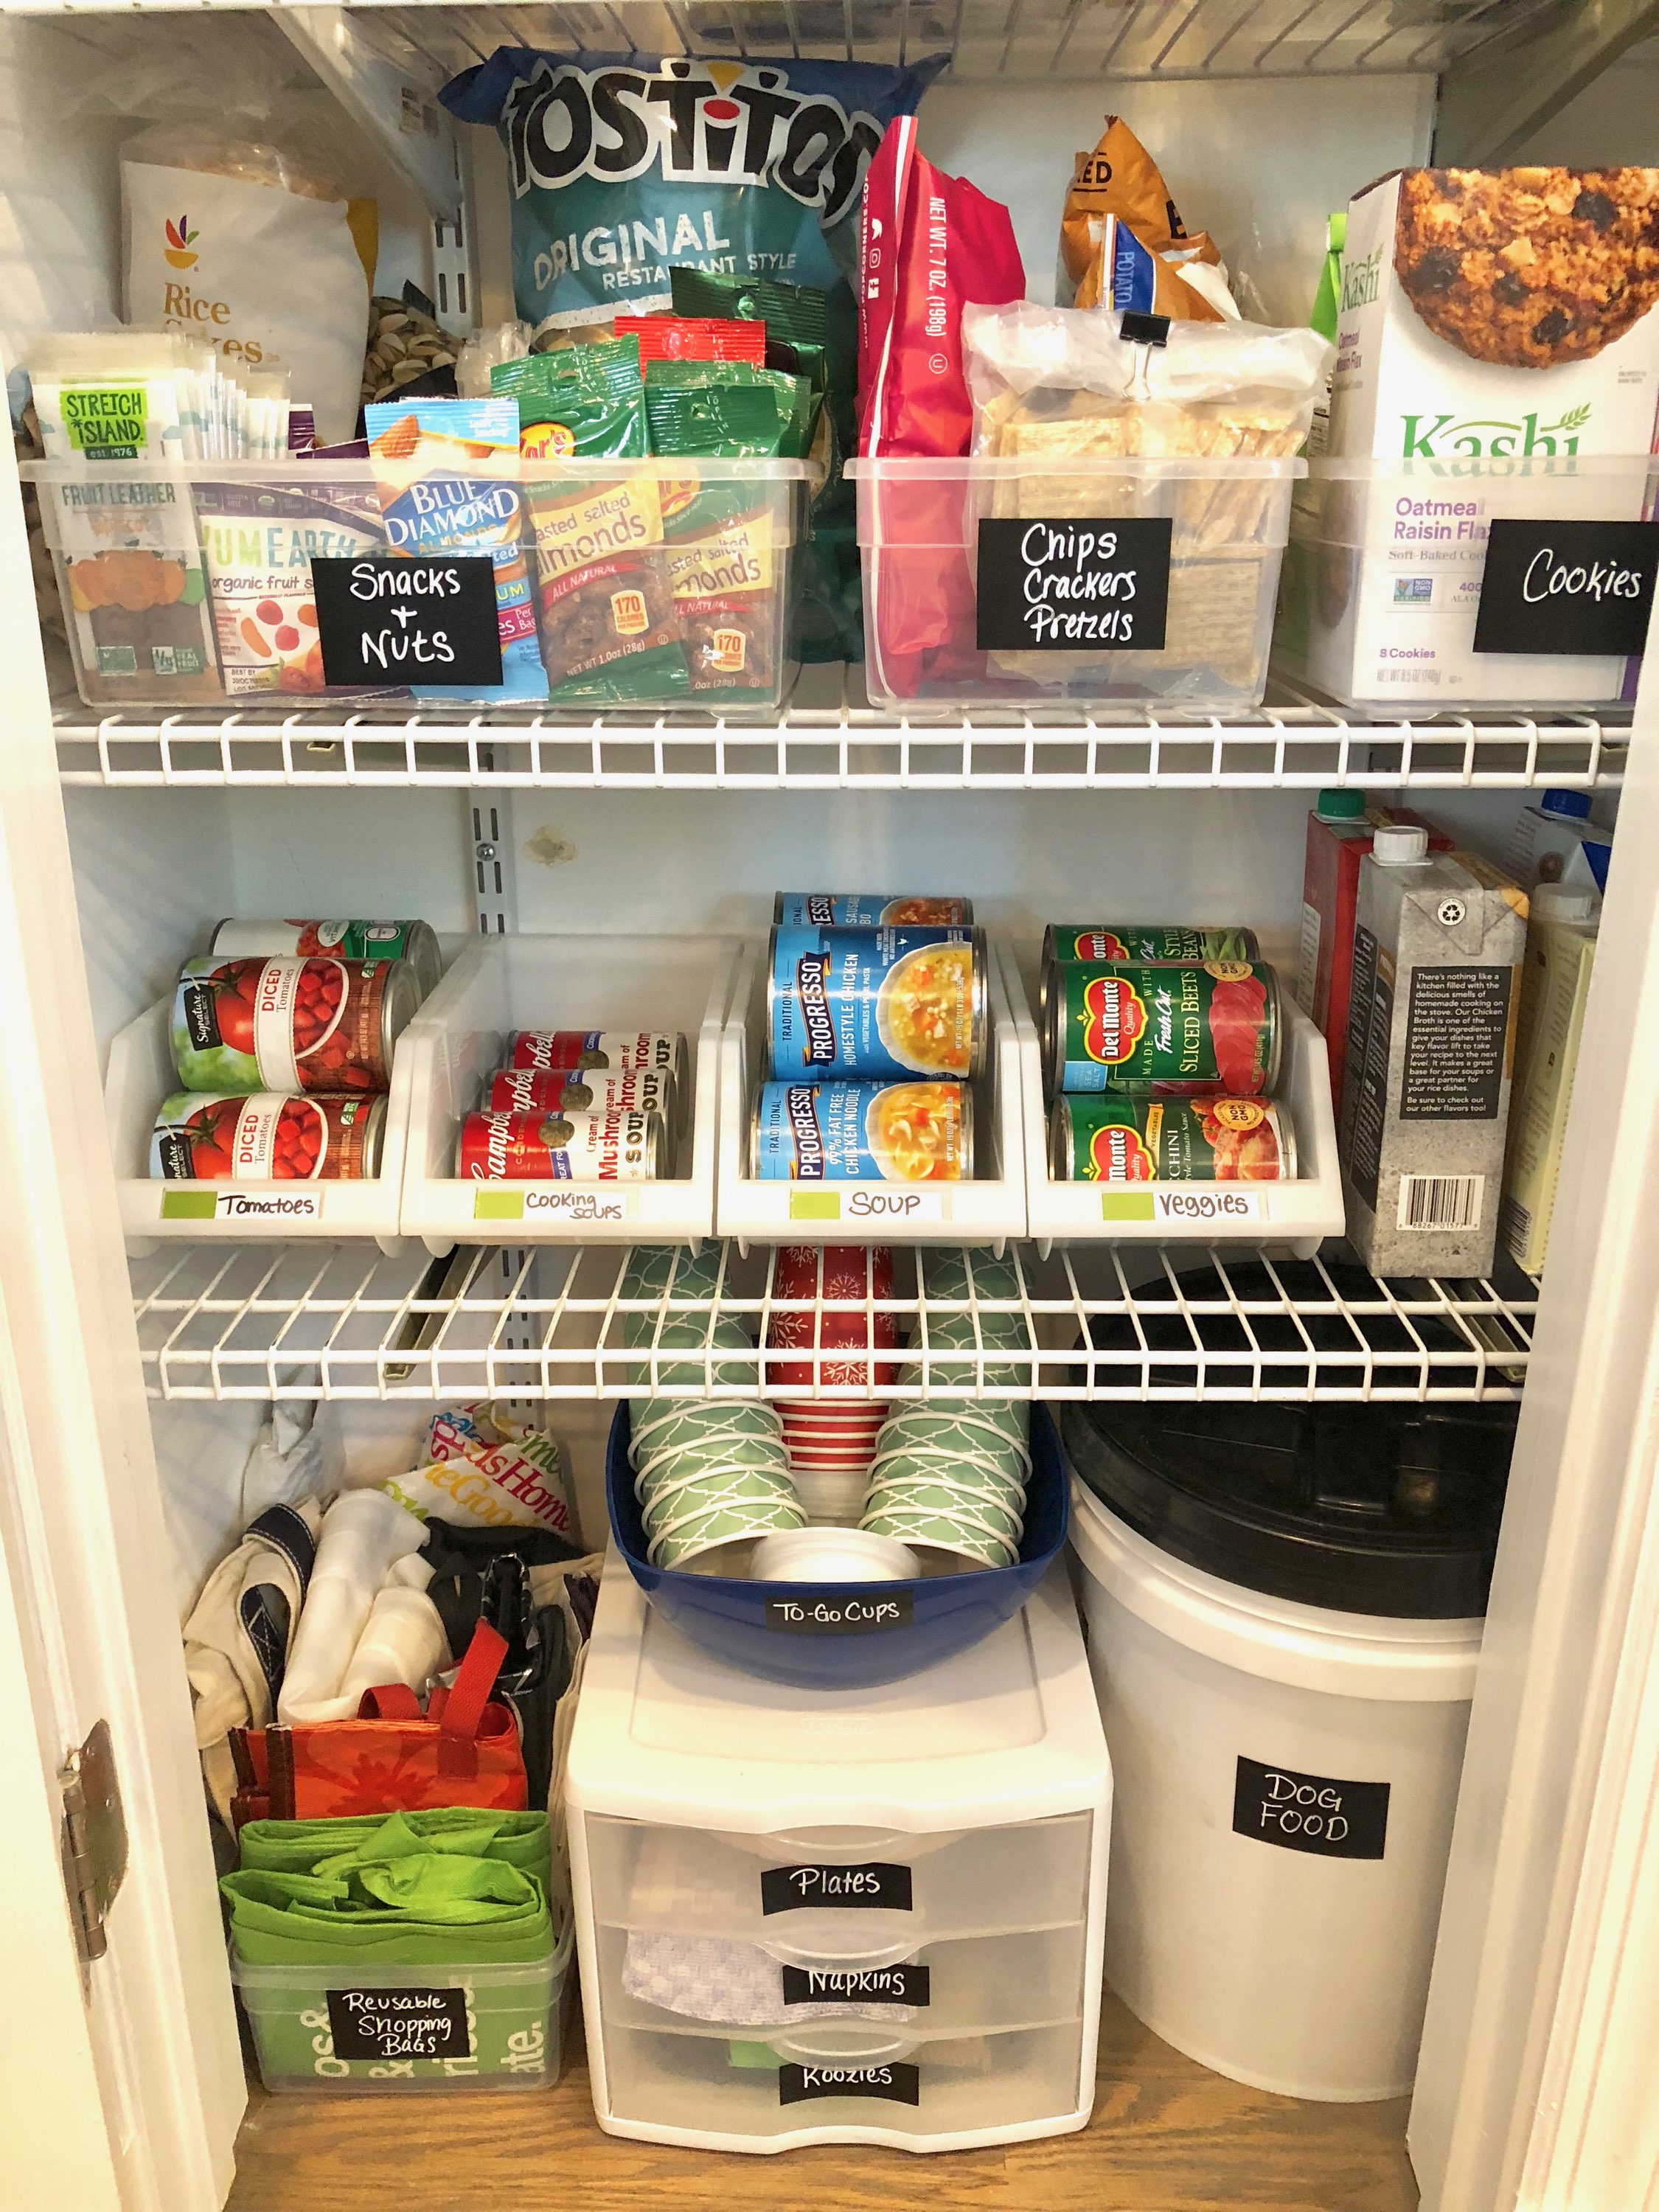
When organizing, I tried to group things by category.  At the top of the pantry we have a really narrow shelf so I tried to come up with some solutions for it.  I realized that it could easily fit bottled drinks like Gatorade which take up a ton of room in a cabinet.  I also have s'mores stuff for the summer, so I figured I would group all of those items together so when we entertain, it is easy to grab the whole bin out and have everything in one place.  I placed all cereal and breakfast items together on one shelf and just below that shelf I grouped together things like granola bars, breakfast bars, and protein bars.  I figured this would make it easier to find and for my husband to find the things that he wants without rummaging through various shelves and messing up the beautiful organization! On the next shelf I grouped together snacks, chips, pretzels, and cookies. Below that shelf, I placed my canned goods like soups, veggies, and broths.  I tried to organize the canned goods by type.  For example, canned tomatoes placed together and cooking soups placed together.  The idea is that when you go to cook, you don't have to spend time sifting through various bins to find what you need.  

One big thing I figured out is it is always important to utilize floor space! Now I can see people saying ew, not going to put my food on the floor, and my response is you don't have to!  Use any space below your shelves to store miscellaneous items that you don't want taking up space elsewhere in your house, but that you use frequently and want easy access to.

As you can see in the picture above, I used my floor space to hold things like our dog's food.  By the way, don't spend tons of money on those fancy dog food bins, head over to Home Depot or any hardware store and pick up an airtight bucket!  I found this one that is food grade on Amazon! You can fit a ton of food in it and the lid seals even better than some of the specially designed dog food containers do! Now, back to the floor storage...Aside from the dog food, I decided to use a small set of storage drawers for things like paper plates, napkins, and koozies (don't ask me why we have SO MANY koozies) all things that I hate cluttering up my cabinets with! I also had an extra shoe box bin so I decided to put all of my reusable shopping bags in it!  This way, I might ACTUALLY remember to use them.

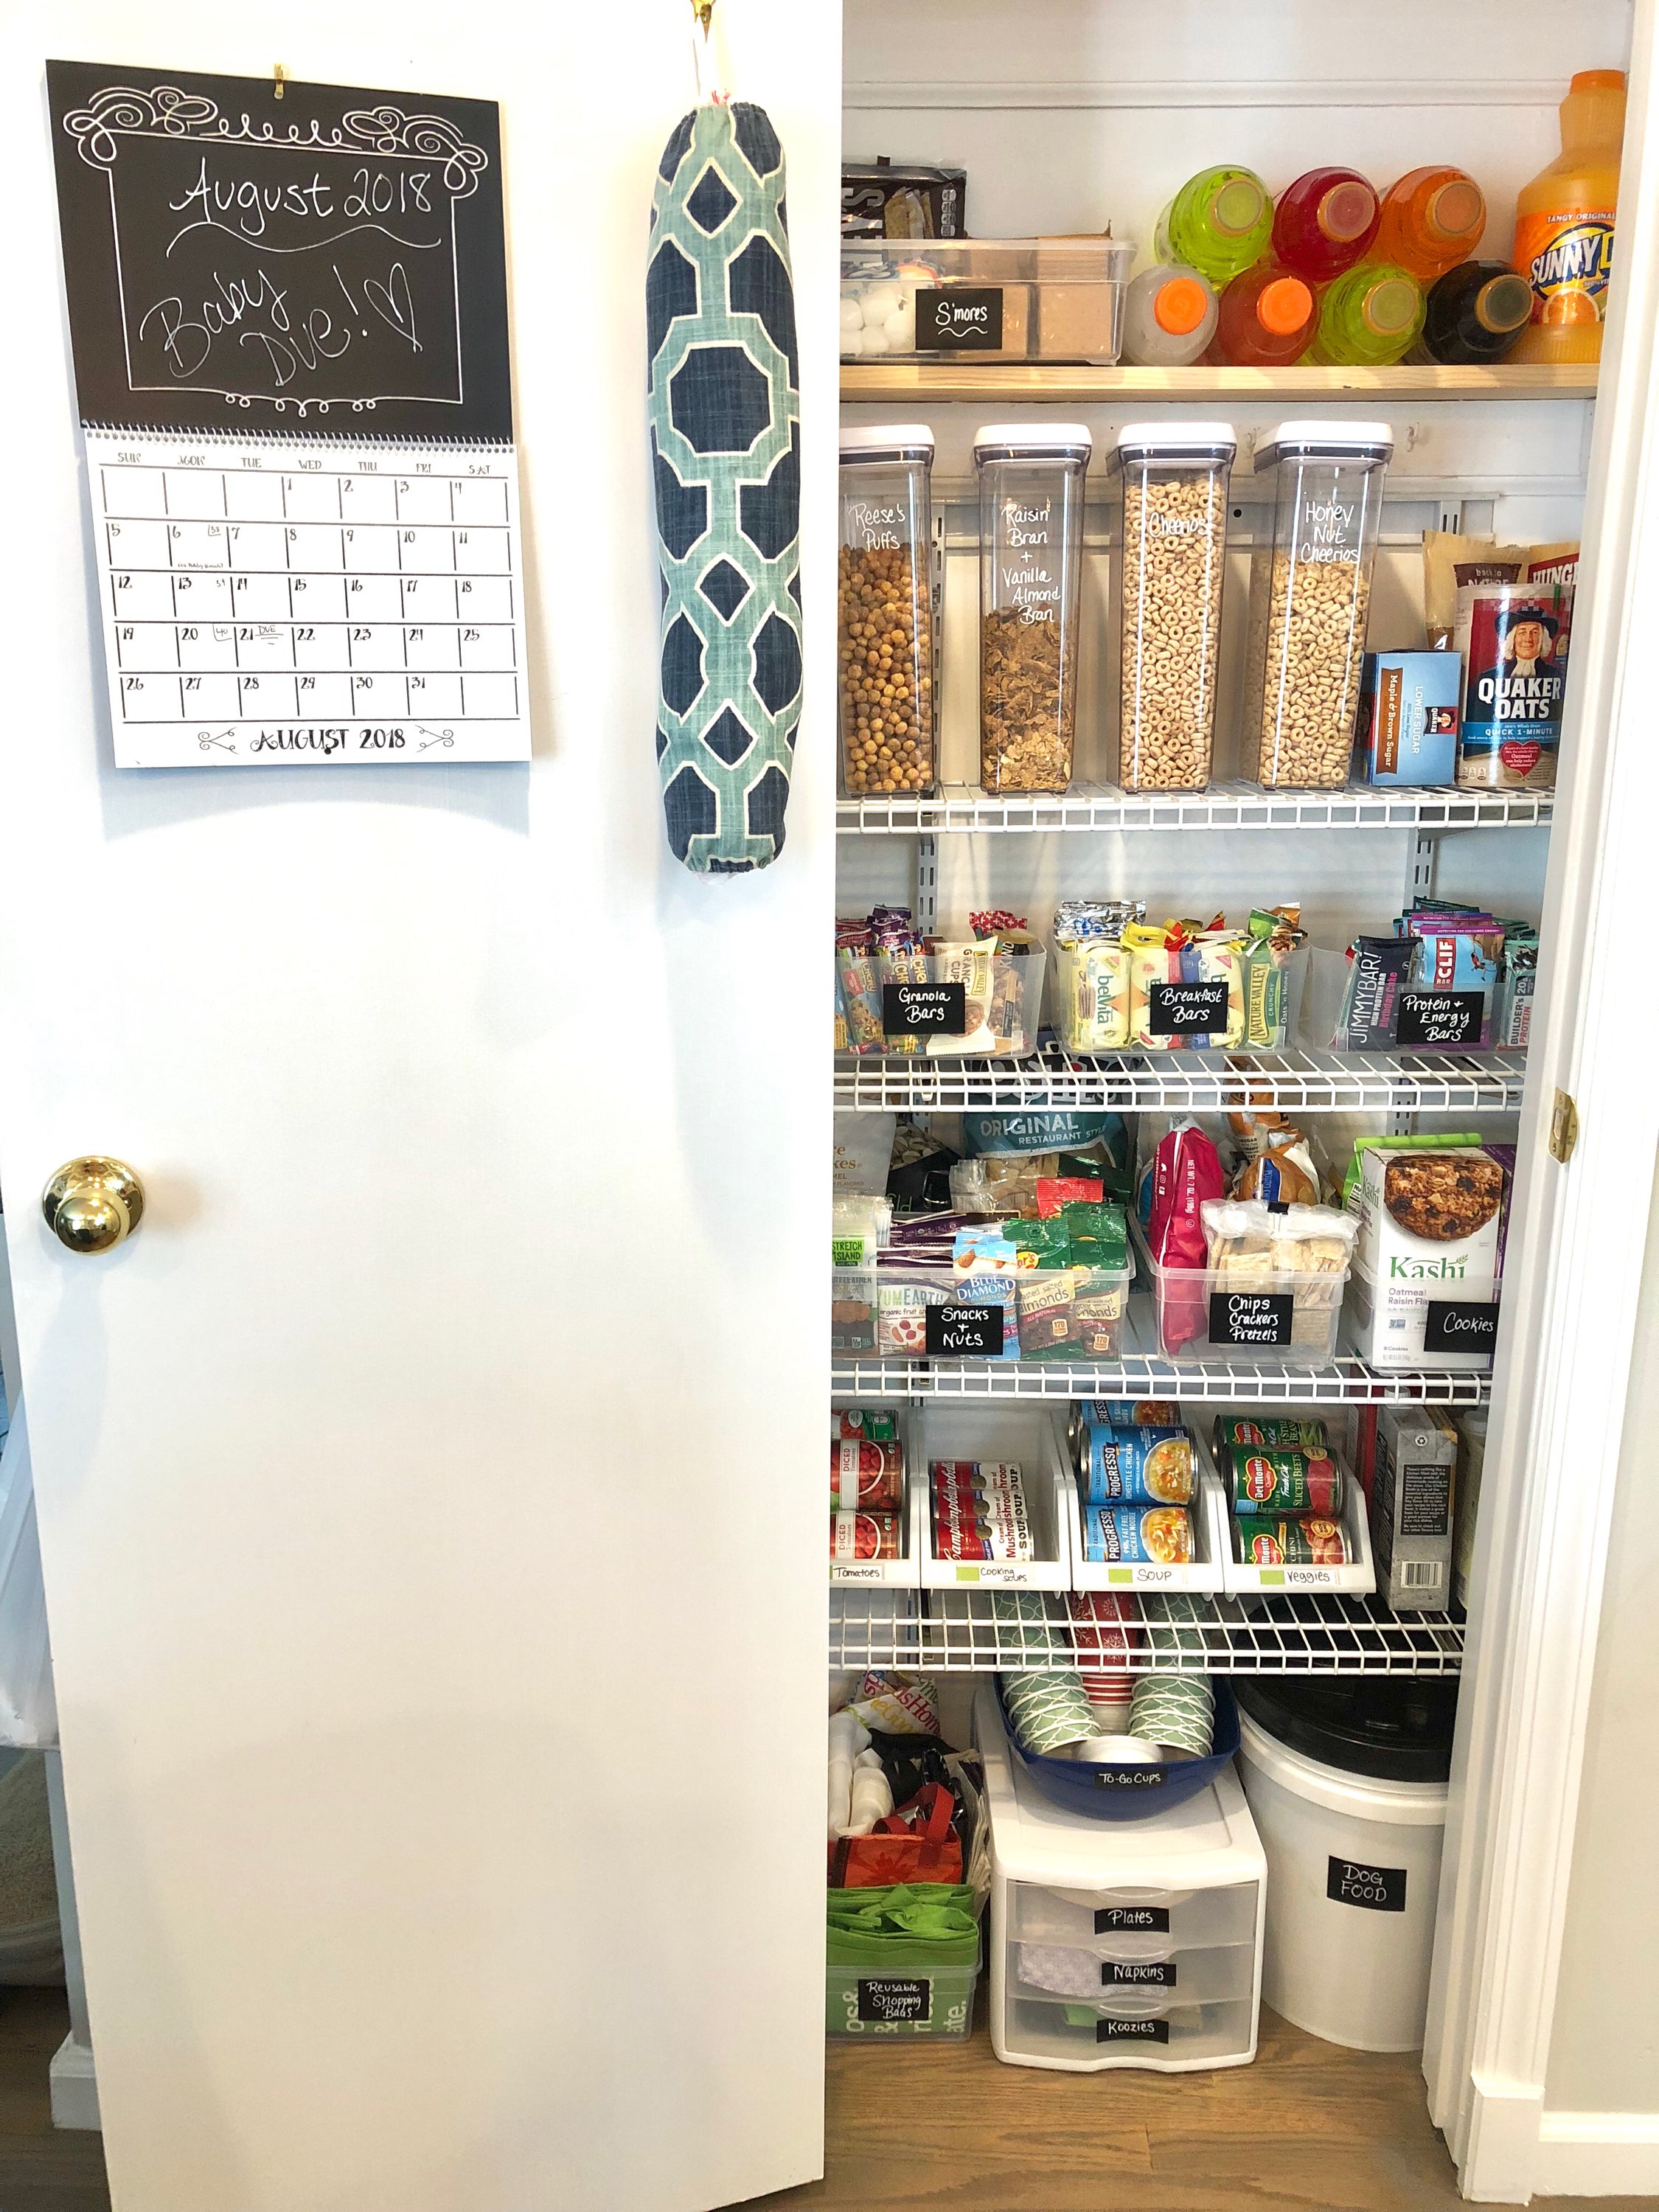
STEP 4: UTILIZE DOOR SPACE - Don't forget that your door is also useable space in your pantry! Now at some point I'll probably try to make even better utilization of it, but for now, it's the perfect place to keep a calendar, since I can't remember anything these days and also those dreaded plastic grocery bags! Does anyone else feel like they haunt you?  They are everywhere! I highly recommend getting one of these cloth bag holders because you can easily hang it on the door and it doesn't take up any space and they won't be falling out everywhere! 

You can see how I utilized the door space and finally the FINISHED PRODUCT! 

I've linked all of the products for you within the step by step guide so you can get organized too!  By no means do you need to use everything that I did, but I found that these products worked really well for me and also for spaces that are shallow and don't have a ton of room.  Let me know if you have any questions - you can always email me directly or reply in the comments below! 

HAPPY ORGANIZING! 

XoXo - Jamie 

**Post contains affiliate links for products which I personally recommend.  By clicking the links and purchasing the products, I may earn a commission. I do not include affiliate links for the purpose of solely earning product commission, I do so in order to share products I love with you! Purchases are made as-is as the consumers discretion**